Efficiency and fun from using ADB Shell, Part 2 - I/O
Continuing this series of articles I want to tell more about basic input and output provided by Android Debug Bridge.
Input
Pretty often happening that we need enter specific data to register/login/connect into our application. Thankfully we can do it easily with adb. To input user/pass we use flag text and to go to second EditText key event
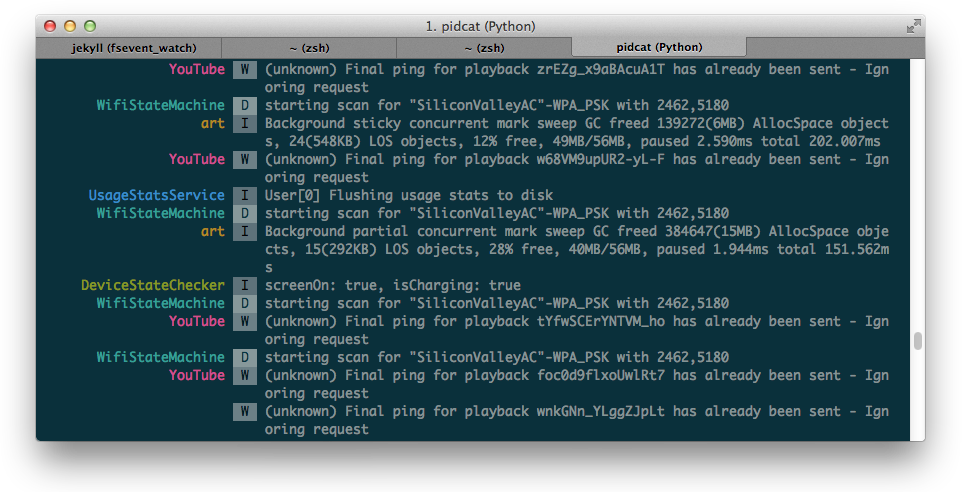
adb shell input text username; adb shell input keyevent 20; adb shell input text username; </pre>We can enter set of commands either sequentially either pass all commands for shell inside of quotes, depends on design of our layout we may need to go up/down between `EditTexts`Sometimes it may help to avoid hassle of entering data every time.  Thanks for Rene Barbosa we can see [full list of keyevents](http://stackoverflow.com/a/28969112/1823992) plus use of `swipe` and `tap` flags. We can mix commands as we wish for example to **unlock screen**:adb shell "input text 2; input keyevent 20; input text 1; input keyevent 20; input keyevent 20; input text 192.168.18.123; input keyevent 19; input keyevent 19; input text 7050;"//26 --> "KEYCODE_POWER" adb shell "input keyevent 26; input swipe 200 700 200 0;" </pre>It might be come in handy to add in gradle build script like a last task for example:## Output We can use several information channels for output with adb `logs`, `screenshot`, `screen record` ### Logs To see logs we can use embedded adb command `log cat`. Mixing with `tag`, `priority` flags and tool `grep` we can get any information listed in logs.def wakeUpViaAdb() { exec { //put your own shell executable "zsh" args "-c", 'if (($(adb devices | wc -l) < 4)); then adb \ shell "input keyevent 26; input swipe 200 700 200 0;"; fi' } } android.applicationVariants.all { variant -> variant.assemble.doLast { wakeUpViaAdb() } }//TAG:priority(V/D/I/W/E), we will see verbose priority logs with tag WifiStateMachine adb logcat -s WifiStateMachine:V </pre>But I considering to be more convenient to use [PID Cat](https://github.com/JakeWharton/pidcat) by Jake Wharton because of highlighting priority with colours and look up by a package. It just python script and could be run easy everywhere.  ### Screenshotsadb shell screencap -p /sdcard/screenshot.png && adb pull /sdcard/screenshot.png </pre>We can also use nicer one-liner getting output [straight away](http://blog.shvetsov.com/2013/02/grab-android-screenshot-to-computer-via.html)adb shell screencap -p | perl -pe 's/\x0D\x0A/\x0A/g' > screenshot.png </pre>### Recording screen Starting from version of Android 4.4 we can record screen. Keep in mind that it's not available on emulators.//size for resolution, time-limit time of recording in seconds adb shell screen record /sdcard/temp.mp4 --size 1280x720 --time-limit 5 </pre>There is also very useful gist to make [gif](https://gist.github.com/lorenzos/e8a97c1992cddf9c1142) out of a video. These are the basic input/output commands for adb. In next Part, I’ll tell more useful tips and tricks about adb and Android. Stay tuned and keep investigating this wonderful Android World! ;)
Written on January 2, 2016
